
 I got my room almost done and I have the perfect spot for some bookshelves. But honestly I do not have $350+ for some nice shelves, so with one of my great doors from my salvage excursion
and some salvaged wood from old furniture I have had the inspiration to make some bookshelves out of it! Yes, a big project, but with proper planning I think I can pull this off for next to nothing. It will take resourcefulness, time, and a good plan.

A good plan:
Whenever I get started on these type of projects I put my drafting background into action. Actually I am a little OCD when it comes to this phase of my projects. It's a talent! I admit that. Sometimes it's hard to recognize your talents, but this is one I can claim. Many friends ask for my help in this area because it comes very easily to me and I love to do it.
So here we go! I have the major supplies for my shelves and now lets figure out how I am going to use them. A good plan will ease the process and eliminate errors that cause waste. Here is my plan:

Resourcefulness:


I cannot throw good wood out and it drives my husband crazy to have all this scrap wood in our garage. But after it's all said and done he sees that I really will do something with it he has learned to trust me! It usually turns out for the best. We had a dresser that was poorly made but still had some great plywood and even some solid wood crown moulding. I will use those items for these great shelves. I got a hold of another door that I will use for the sides and it will look perfect! So as of now I have the door for the back, the door for the sides, the wood for the shelves, Some faux legs that we have had for the past 3 years, and the crown moulding. I need some detail moulding for some finishing touches and hopefully we can get that at Al's salvage yard for next to nothing. I am hoping with my resourcefulness I can get these fabulous shelves built for under $50! I decided to use all wood mouldings. This is going to be a heavy duty piece of furniture, so I wanted it to be all wood for durability.
Time:
Time can often be the biggest obstacle in getting a project done. I have so many projects to do and not enough time. So this is the slow going part for me. I have great friends who are always willing to help me, which is great when cutting big doors! Thank Traci! :)


(wear your safety goggles!)
I have found some time to get all the shelves cut out and the side door cut in half. Now comes assembly. This is where you sometimes need to tweak your plan. I only had 5 pieces of wood the right size for the individual shelves so I will alter my plan a little for that.
(6 months later-yea, that's how I roll)
I found some spare time and now I will get these shelves done! Since I had all of my prep work done and have the majority of my supplies, it is time to assemble. When I cut the door for the sides in half I was sure to cut it down the middle of the panels, not necessarily the middle of the door. I later trimmed the side that was too big to make the sides even. If I had cut it down the middle of the door the sides would have been even but not symmetrical.
I overlapped the sides around the back door. (see pic)


I then applied 1" square braces for the shelves. Note the angle cut on the ends to mask the braces a bit. I was sure the sides covered the whole side since some of the braces went over the recessed panel. All of my shelf placements were around the paneling of the back door. I tried to be consistent so the panels reveled were pretty close in how they aligned with the shelves.
More details:
- While getting my moulding from the salvage yard I found a 1 1/4" moulding to face the fronts of the shelves. Since I used plywood I needed to cover up the end of the shelves and this touch gives an illusion of thicker shelves while masking the wood braces underneath.
- I used a 3" chair rail moulding to go around the 3rd shelf from the bottom. I wanted to bottom to feel a bit more substantial and this was a good divider from the bottom and top.
- A huge detail for the bottom is the half sawn legs. I had these from my kitchen remodel and never used them, so these were perfect! These really add substance to the bottom to set it apart.
- For the bottom I ended up using a base board and some spare moulding rather than my initial plan. I was afraid if I had done a cut out, random things may have ended up under the bookshelves. Note I did have to use some scrap wood as a brace for the base to be secured on.
- The top sides did need a little doctoring as well. The side door is a solid core door but the solid interior was more of a pressed board so there were some dimples that would show. I did have to put a piece of lattice moulding to hide the dimpling texture. Then for added detail I found a great scrap of moulding. I don't really know how to describe the pattern, so see the picture below.
- For the crowing finish of the shelves I used a 3" crown moulding with a dentil moulding detail. I used some pine for the top and added another moulding to face the top. This adds to the illusion of a thicker crown.
- Just under the crown is some 3/8" craft wood that I cut the arches out with a scroll saw.
Finishing touches
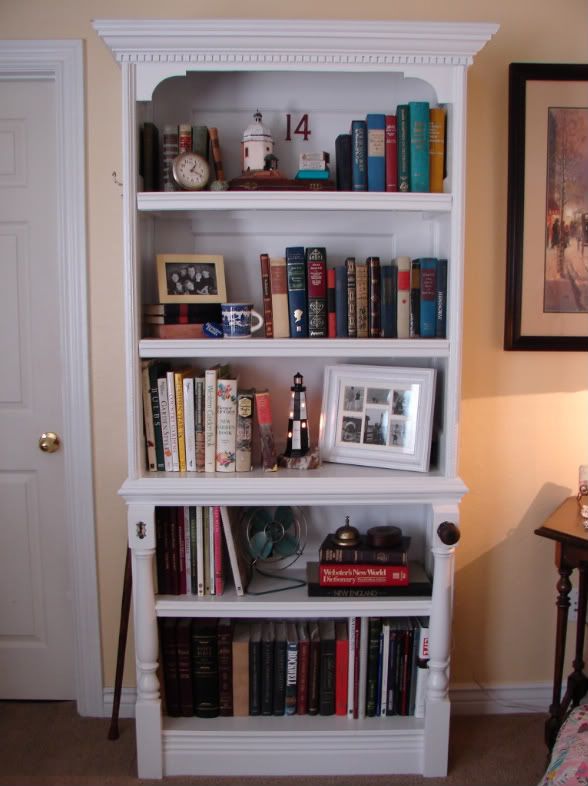
See the following pictures for the little touches I added to give some personality.
- The old door knob and face plate give add to the charm of shelves made out of doors.
- The escutcheon keyhole plate is another fun touch. I still want to add a cute hook of some sort with a key hanging from it. I did drill out behind the keyhole or you could paint black behind the plate.
- The old hook and numbers were a fun salvage yard find. Hook already had paint layers on it and I just need to install, but the numbers did need a few layers of different colors of paint to simulate years of paint.


All in all this was a very fun and rewarding project. I love how they look in my room now and it is a great focal point! I did stay within budgets so that makes it all the more rewarding! Hope this can inspire others to find fun things to do with old architectural items.
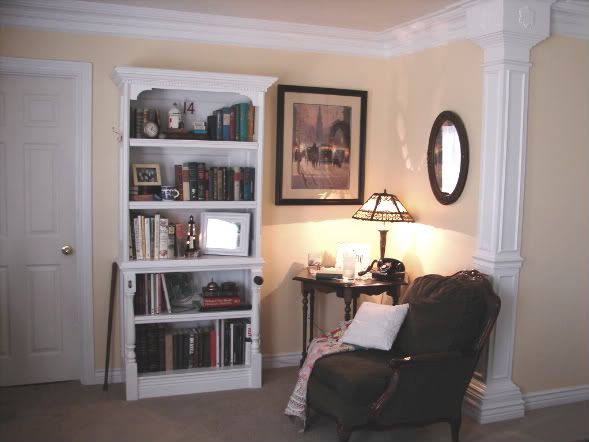
*a note for realism! Staging is fun and is great for pictures. I had fun finding all the old books in my house and making theses shelves picturesque. After all was said and done these shelves hold my text books, photo albums, and fun novels. I still try to make it look nice and the top shelf has stayed decorative, but I do have to live in reality and live with function, it still can be cute. right? So now just image a couple of loads of laundry sitting by the chair and welcome to my world!
5 comments:
K Seriously AMAZING!!! I am astonished first at your drafting talent, especially since I am one who uses your talent and second at the before and after! I was glad you took pictures through the whole process! Thanks for posting Erika!
really amazing! REALLY! I wish I had tools!
I love this project and that you're blogging again (I've been stalking your blog for awhile)
Thanks Amber. I have a gazillion ideas to put on here its just the time :( But I am glad you like it. Just be patient with me and I will get things on here when I can. :)
Erika you did an amazing job at this. I get weepy looking at your blog it reminds me of living in the 'hood with you guys. Tell everybody I say Hi! I can't wait to see what else you've been working on.
Post a Comment