
A great way to revive an old piece of furniture is with a fresh coat of paint. There are many times you can find a raggedy old piece of furniture at a yard sale, thrift store, or for sale on the internet. If you do find that great piece of furniture and it is structurally sound, it can be fabulous with a little of your time and a small amount of money.
When we were moving I had a bunch of furniture that I wanted to paint. So I took this opportunity to tarp off the driveway and take advantage of our friend's sprayer. I first had to rough some stuff up and then I sprayed a primer.

The pieces of furniture that I was not going to paint white were set aside then I painted the remaining furniture white with the sprayer. I have been asked many times about if it is better to spray or to brush when painting. There are pros and cons to both methods, and it would just depend on you. Since I had so many pieces that I had been wanting to paint I decided to try and spray it. I used an eggshell paint which came out very rough. I knew I would be sanding the furniture after painting and thought it wouldn't be a big deal, but it was. It was very textured and required a lot more sanding to smooth it out then I had planned. Overall because of the amount of pieces sprayed, it was nice to spray it, but it really wouldn't be worth it for one or even two pieces. It still was a multiple day process that comprised the painting, sanding/distressing, and the clear poly acrylic top coat. It was exhausting, but worth it to me.

KING SLEIGH BED
 |
| Before |
I got this sleigh bed many years ago and the it was getting very scratched up and the finish was suffering from years of kids climbing over the footboard. I had been tossing up the idea of painting it white for years and I loved how it turned out! It is still very sturdy and solid, it just needed a face lift and it's a brand new bed!


FOYER TABLE
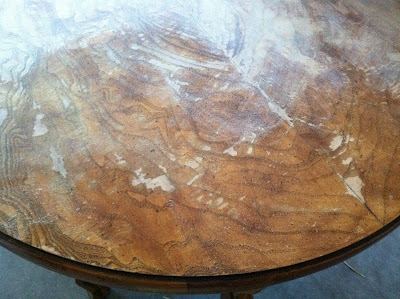
I found this table at the thrift store on half price day. It had some great lines and some fun little details. It was a little wobbly, but nothing was cracked, so it seemed like a great buy.

With the help of my trusty detail sander I needed to rough up the finish. This table had a thin veneer finish, that was chipping off. The sanding was able to even out the topcoat while roughing up the finish for the primer to grab better to the table.


While doing the sanding, this was a great opportunity to take the table apart and re-stabilize it. the table was wobbly but the screws were loose and a little wood glue on the dowel pins firmed things up a lot!


Once the table was all sanded and put back together, a coat of primer was added to assist the paint in adhering to the table. The finish on this table was very glossy and I really felt that sanding as primer was needed to assure a better paint job.

I brushed on a white finish and antiqued it with stain. It is a great table for my foyer and only cost me $12 since I already had the paint and supplies.

I brushed on a white finish and antiqued it with stain. It is a great table for my foyer and only cost me $12 since I already had the paint and supplies.

Now I just need to decorate it properly :)
BED AND BEDSIDE TABLE
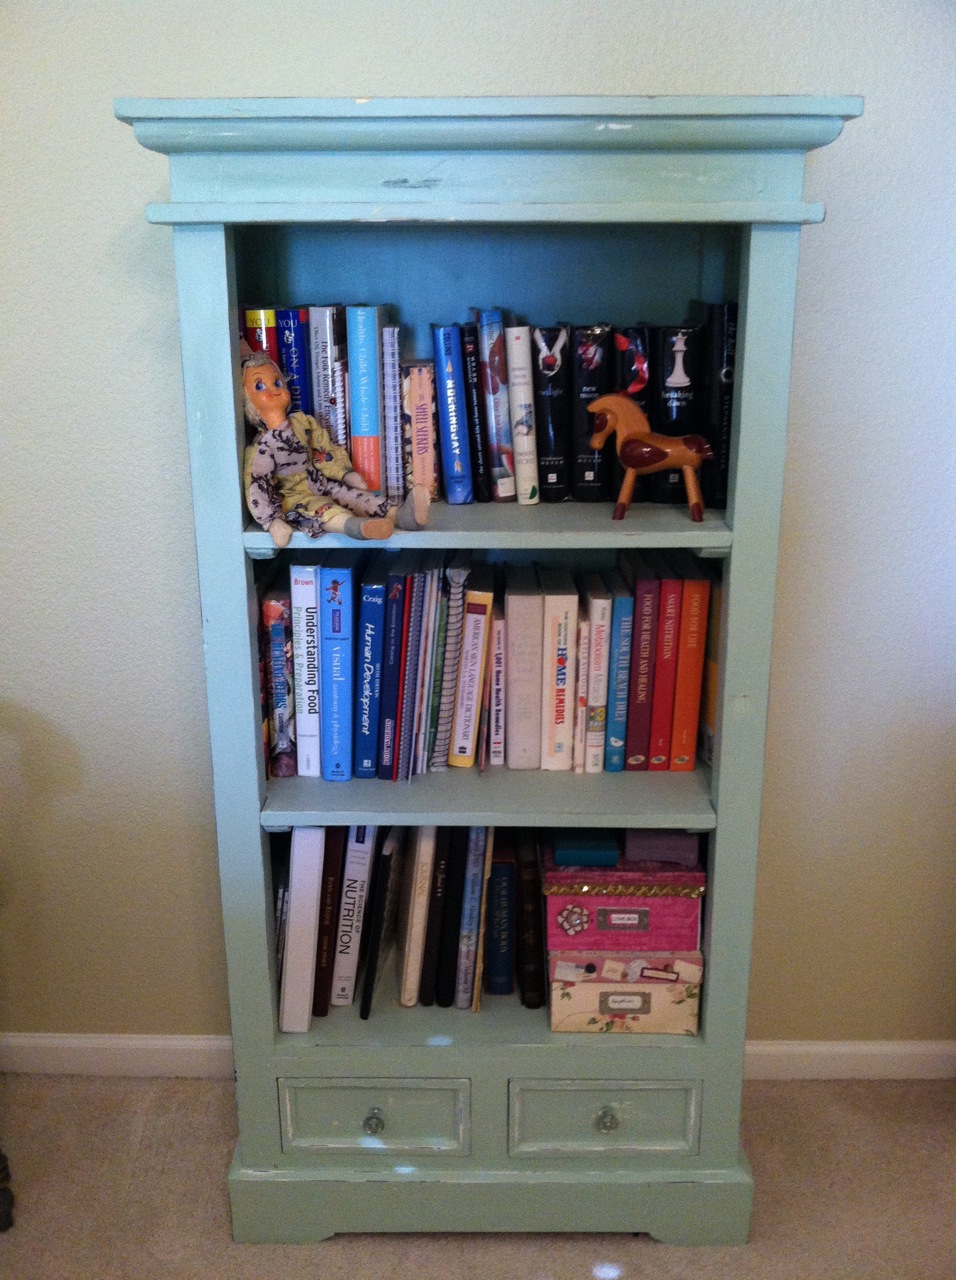
The bed was an internet find and I loved the vintage touch. My daughter wanted her bed and table to be blue, so we headed to Lowes to buy a good robin's egg blue paint. To my luck I found just what I wanted in the oops paint and got a gallon for $5. I always recommend checking out the oops paint first. It will save a good amount of money if you can find the color that you want.

I found this bedside table at a yard sale for 5 dollars. I has a great little drawer and the shelf underneath for books. To give the table some personality I glued some bead board slats to the back of the shelf area. I love the cottage touch the bead board added to it. Now I am a bead board snob. You can find the bead board in sheets but I really like the tongue and groove paneling better. The beads are more defined and if you are just doing a small project, it's not really much more, but that's just my preference.

I did grunge up the paint job, which added to the distressed look. To find more info on distressing your paint project, check it out here. I used a walnut stain and then put a clear coat over the top.


Finished Products:


 I got the table completed and love how it looks in my craft room (post to soon follow). I put a velcro skirt around the 3 sides of the table to hide some baskets of fabric and a drawer caddy that I use, and it just looks so quaint. The hard part was finding the fabric that I liked.
Here is a picture of the table at a church activity.


All of the furniture shown was painted with your basic interior water based house paint that you get at a home improvement store. Many have asked about using spray paint, which is an easy way to paint. What I like to use spray paint for is smaller jobs like painting frames, mirrors, and metal items. If you have something already painted with an oil based spray paint you either need to prime it to paint with an acrylic enamel paint, or use spray paint. Keep in mind when painting that water paints like to bond to water paints and oil based paints (spray paints), like to adhere other oil paints. You will find out pretty quick if you have mixed the two items up when your paint will not stick and clumps up.
So here's to your next project!! Good luck finding that great piece of furntiure that you can bring back to life and give it a touch of your own personality.


Finished Products:


DRESSER
This dresser was another garage sale find. It was painted a bright blue and had yellow stars on it. It was definitely in need of a re-do. It was primed with all the furniture and then brushed red. The knobs were courtesy of the 1/2 sale on knobs at Hobby Lobby. The drawers don't work very good and will need to be rebuilt, but I use it for storage that is not accessed very much. Another job for me down the road.

TV ARMOIRE/CRAFT STORAGE
We had bought this armoire years back for our bedroom TV. As time went on and TVs became mounted on the wall, this became hall storage. When we moved I was able to use our formal living room as my office/craft room. This armoire was primed earlier and I brushed it with the same color my island in my old house. (a little sentiment) Crystal knobs finished off the face lift.

Because this armoire was formally used for a TV, the back was cut out and wide open. I got a 1/8 piece of plywood and cut it down to size to fit in the back of the armoire over the opening. Rather than painting it, I took some fabric and spray adhesive and the back is now covered in a charming little fabric. I love how it turned out. It is a great place to store my crafting supplies, and looks amazing!!

CRAFT TABLE/DESK
I needed a desk for my craft room so I just search one the internet for a table for sale by a private owner. I found this table that was in desperate need of a paint job, but had fabulous details! I loved the scalloped edge and the details on the legs. The top of the table even had a notched out detail on the corners. The girl I bought it from, Laura, was a kindred spirit and initially wanted to paint this table too and just had too many projects on her plate. She has a great blog called My Dear Trash, and she shares some awesome trash to treasure stories.
Here is a picture of the table at a church activity.


(The last picture shows the detail of how the skirt was attached with Velcro on the inside of the table.)
Other Painted Furniture in My House
 |
| Antique table that used to belong to my Great Grandma. It was in desperate need of refinishing. |

After


Ikea step stool, now on it's 3 coat of paint. This stool sees a lot of wear and tear. My distressing and antiquing beat my kids to grunging up the stool.

Some book shelves found at a a consignment furniture store in Phoenix (J & K Furniture)
All of the furniture shown was painted with your basic interior water based house paint that you get at a home improvement store. Many have asked about using spray paint, which is an easy way to paint. What I like to use spray paint for is smaller jobs like painting frames, mirrors, and metal items. If you have something already painted with an oil based spray paint you either need to prime it to paint with an acrylic enamel paint, or use spray paint. Keep in mind when painting that water paints like to bond to water paints and oil based paints (spray paints), like to adhere other oil paints. You will find out pretty quick if you have mixed the two items up when your paint will not stick and clumps up.
So here's to your next project!! Good luck finding that great piece of furntiure that you can bring back to life and give it a touch of your own personality.


