I found these lockers a few years back when on a road trip antiquing. They were and a pretty beat up barn and very rusty. Now, I love rusty and shabby, and we used these lockers "as is" for many years in the garage. I wanted to clean them up a bit and paint them to continue to use in the garage. The previous paint job had covered the original label and I was hoping I could restore that as well.
Hope you enjoy the restoration process as much as I did.
 |
| Not much luck in researching lockers, but these lockers are from the Berger Mfg, Republic Steel Co in Canton, OH. Best guess from the old Yale locks in place that they are from the 1930/40s. |
The perfect spot in the garage.
Time to clean up.
As with any restoration project the first part is the worst. I want instant gratification and to just start spray paining. But no. I had to get all the prep work done. Cleaning, vacuuming, and stripping some of the old paint off. (I wasn't too bent up on getting them stripped down to bare bone, because I do want to keep some of the shabby properties. Also the rust was pretty thick, so I am embracing the shabby destiny of these lockers.)
I was thrilled to see how easily the paint came off the labels and restored their original look without damaging the original paint. I love the rusted look of the brad/rivets holding the label as well.
A new pallet!
You can see there was a pretty significant amount of rust and also you can appreciate the original gray color.
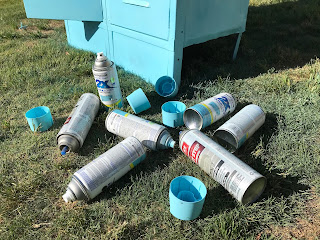
Now it's time to let the paint SPRAY!!!!
 |
| I use the Rustolium Satin Aqua for the exterior and Ace Rust Stop Stone Gray Satin for the interior and bottom. |
 |
| The sky was bluer that day..... |
--My only complaint with the Rustolium paint was that some cans would not spray evenly, no matter how long I shook the can. The first few minutes of spraying would have spots of darker color. Go figure.
Step by step image of the transformation:
The gray interior was painted first and left to dry. It locks were removed and the labels were taped off and fist to size with an exacto knife. Note the green scrapbook paper that I taped on each door to prevent overspray at the lock hole and vents. Painters tape and moving it to each door as I sprayed minimized the touch up later on.
Antiquing: To antique I use the Kryolon Wax Coating Chalky Finish, Dark brown. Thinly sprayed in directly on the lockers and wiped it down with a clean white cotton cloth. A little paint thinner was used in the end to clean up thicker areas if needed.
I enlisted the help of my mechanically minded son to help re-install the locks. A couple of the locks were permanently in the locked position and those doors would not close all the way. We decided to remove all the locks rather than tape them and then after fixing the 2, we reinstalled them and it was nice to have the rusty screws and locks. I have 8 of the original knobs that were also replaced, now I will just have to find similar replacements for the top 2 lockers. Love how they turned out and the function they bring to the garage.
A little cleaner storage area and a clear rubber shelf liner was added.


No comments:
Post a Comment